2. Centering and rough leveling
A good initial tripod location will make the set up process easier. The new surveyor should avoid trying to "carry" a TSI and tripod over a point while looking through the optical plummet and keeping the legs spread. It is not only comical to watch but ultimately a cumbersome way to learn setting up.
The following is a systematic process to center the TSI over the ground point and make it approximately level.
Step (1)
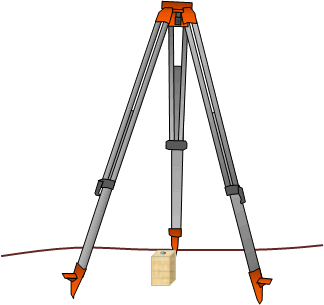 |
| Figure B-2 Setting Up Tripod |
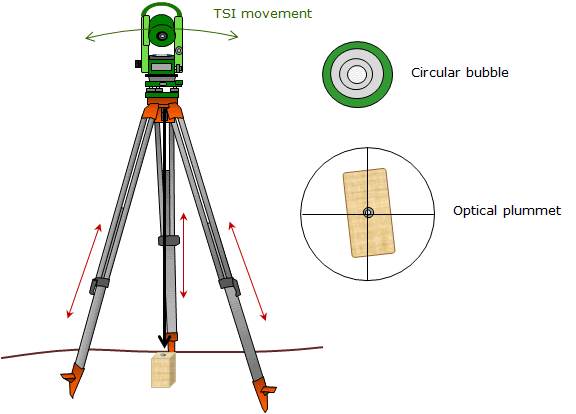
The tripod top should be relatively flat, with the legs spread to provide a stable platform, Figure B-2. First-timers may find it handy to suspend a plumb bob or drop something, like a set of keys, from directly below the tripod head to see where it is with respect to the ground point.
A common beginner's error is setting the tripod too high. While the height makes it convenient for sighting through the optical plummet, the TSI is too high for comfortably sighting through the main telescope.
With the tripod approximately over the point, the legs should be firmly pressed into the ground...
Step (2)
...attach the TSI to the tripod using the mount screw.
The tribrach should be oriented parallel with and centered on the tripod head, Figure B-3.
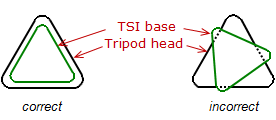 |
| Figure B-3 Aligning TSI on Tripod |
Do not over-tighten the mount screw as it may need to be loosened later to shift the TSI on the tripod head.
The TSI will be neither level nor centered at this point, Figure B-4, but we'll start addressing that in the next step.
 |
| Figure B-4 Attach TSI to Tripod |
Step (3)
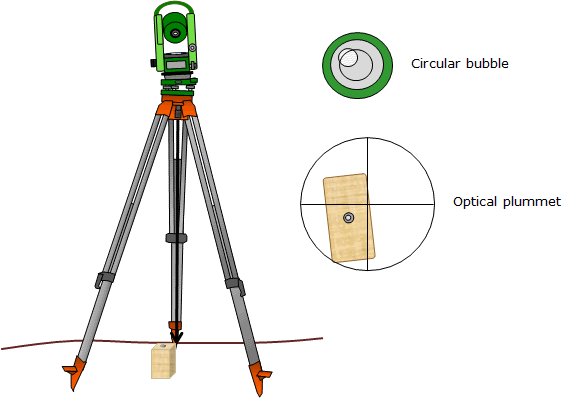
Adjust the optical plummet to remove parallax and focus clearly on the ground point.
(See Topic I Chapter E for a discussion of parallax and how to remove it,)
While sighting through the plummet, center it on the ground mark using the TSI's leveling screws, Figure B-5.
When done, the optical plummet will be on the point but the TSI will not be level.
 |
| Figure B-5 Center Plummet on Ground Mark Using Leveling Screws |
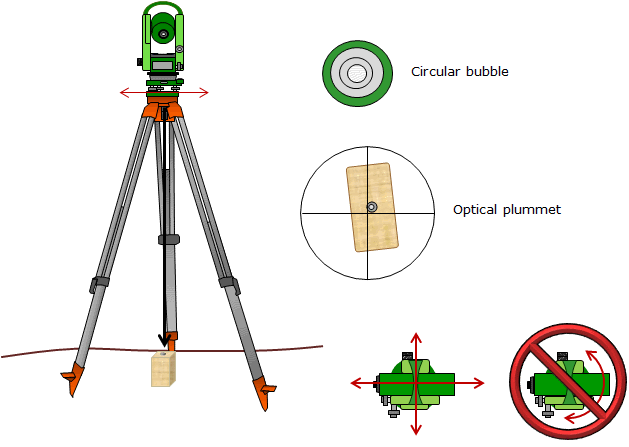
Step (4)
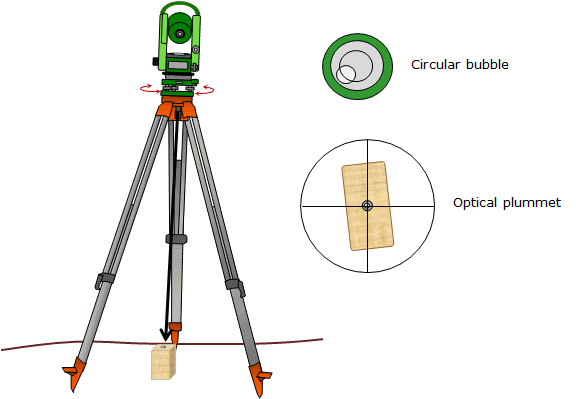
Center the circular bubble by extending or shortening one or more tripod legs.
It doesn't have to be perfectly centered but the bubble should be entirely within its scribed mark
Adjusting leg lengths moves the TSI in an arc roughly centered on the ground mark. As a result, the optical plummet mark shouldn't move much, if at all, off the ground mark.
Be careful when unlocking a leg - the TSI weight may cause the leg to collapse.
Be sure to fully lock the leg.
Now the circular bubble should be centered and the optical plummet on the ground mark, Figure B-6.
 |
|
Figure B-6 |
Step (5)
If the plummet does move off the mark, loosen the instrument mount screw, and, while sighting through the optical plummet, slide the TSI on the tripod top until the marks line up.
Slide to-from and left-right to align the marks, Figure B-7.
Do not rotate the TSI as it is moved - the TSI is leveled with respect to the tripod top and rotating it may cause it to go out of level.
Re-tighten the mount screw.
 |
| Figure B-7 Slide TSI Left-Right, Back-Forth to Re-center if Necessary |