3. Pole-Mounted Bubble
Whether used to support a reflector for distance measurement, as a sight mark for angle measurements, or mounting a GPS unit, a pole depends on an attached circular bubble to be held vertical.
To check the circular bubble and adjust if needed, one of three methods can be used.
a. Adjusted rod bubble
Use a second adjusted rod bubble. Hold the bubble against the pole, center it, and check the attached rod bubble.
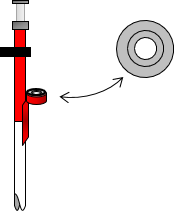 |
| Figure B-4 Using Adjusted Bubble |
The amount the bubble is out is the total amount of error.
To adjust, tighten/loosen one or more of the bubble adjusting screw to center the bubble. The screws are generally located on the bottom of the bubble housing, Figure B-5.
 |
| Figure B-5 Adjusting Screws |
b. Pole tripod
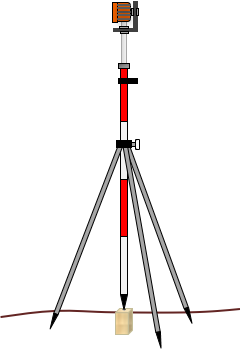
Use a pole tripod to apply the principle of reversion following the procedure in Figure B-6.
|
(1) Insert the pole in a pole tripod and set it on a point. |
 |
|
(2) Adjust tripod leg lengths to center the circular bubble. |
 |
|
(3) Rotate the rod 180°. If the bubble stays centered, it's in adjustment. If it runs... |
 |
|
(4) ...bring it back halfway by readjusting the tripod leg lengths. This makes the pole vertical. |
 |
|
(5) To adjust, use the bubble adjusting screws to center the bubble. |
 |
| Figure B-6 Using a Pole Tripod |
|
c. Plumb bob
If an adjusted rod bubble or pole tripod are not available, another way to check and adjust the rod bubble can be done using a plumb bob, Figure B-7.
 |
 |
|
|
(1) Suspend a plumb bob from an overhead support. Set a mark beneath the plumb bob. |
(2) Raise the plumb bob just high enough to clear the pole. Place the pole on the mark and center under the plumb bob. | |
|
(3) If the bubble isn't centered, use its adjusting screws to correct it. |
||
| Figure B-7 Using a Plumb Bob |
||