2. Horizontal crosshair
a. Description
On an adjusted level, the horizontal crosshair is truly horizontal when the instrument is correctly set up. This allows accurate rod reading using any part of the crosshair.
b. Check
|
(1) Set up and level the instrument. (2) Clear parallax. |
|
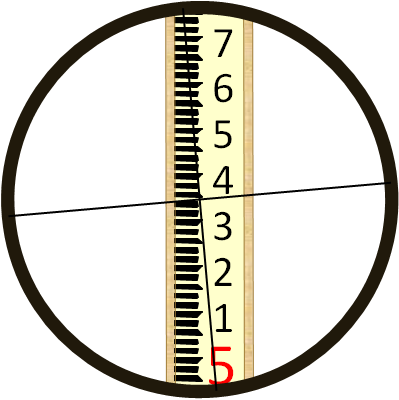
| (3) Sight a rod with one end of the horizontal crosshair and note the rod reading. |  |
|
(4) While sighting through the telescope, use the slow motion to horizontally scan across the rod. If the reading doesn't change. the horizontal crosshair is in adjustment. |
 |
| Figure F-2 Horizontal Crosshair Check |
|
c. Behavior
As long as the their adjusting screws are not loose, the crosshairs will maintain their orientation resulting in systematic behavior.
d. Compensation
(1) Procedure
Use the crosshairs' intersection for all rod readings, Figure F-3.
|
|
| Figure F-3 Use Crosshair Intersection |
(2) Adjustment
The crosshairs are mounted to a reticule held in place by adjusting screws. Depending on the instrument and its age, it will have 1, 2, or 4 adjusting screws. Figure F-4 shows a typical 2 screw system. These are generally located near the eyepiece underneath a cover. To adjust the horizontal crosshair, both screws are slightly loosened, the reticule rotated, and screws re-tightened.
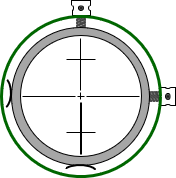 |
| Figure F-4 Reticule |
Unless the horizontal hair is significantly rotated, it's probably best to just always use the crosshair intersection for leveling. Trying to correct a small amout of error could make the situation worse and even introduce collimation error.